
WASD v3 mechanical keyboard review (part 1)
Part one of my WASD v3 keyboard review, starting with pre-sales and customisation.


A while ago I wrote about choosing a mechanical keyboard, discussing the pros, cons and how they work. In this post I'm going to cover my experience of buying the WASD v3 keyboard, and my experience of using it over the last few of months.
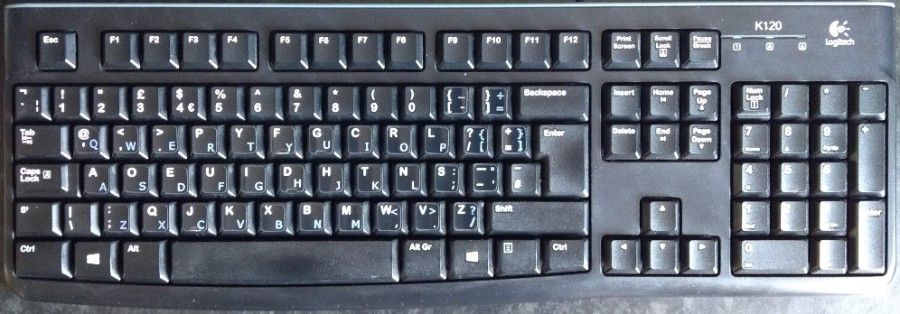
Previously I'd been using a Logitech K120 with added Dvorak stickers (once blue, now very pale). The K120 is a membrane keyboard sold for around £13 and I'd had mine for over five years. It was an OK keyboard but was certainly coming up for replacement - not least because when I get frustrated (programmers do...) I've been known to hit the keyboard. This isn't wise (it damages the keyboard and my hand!) and is something I'm going to have to give up now I'm on my nice new board (not bad advice either).
Pre-sales
I'd initially ruled WASD out due to the cost and due to wanting to support a UK company if at all possible. As I said in my previous post, I ended up choosing WASD as it was the only way I could get the layouts (Qwerty and Dvorak) on the key caps themselves.
As Twitter seems to be where companies do a lot of talking these days ,I pinged @WASDKeyboards a message asking if they were able to perform the type of print I needed. An answer came back fairly quickly confirming they could indeed print both layouts on the key caps. I also asked if the dip switches on the bottom of the device would switch to UK Dvorak or US - sadly US so there's slight differences.
Before committing to a final purchase I exchanged several emails with WASD too, checking various customisations (see below) and responses were initially very swift before taking slightly longer in subsequent replies. Everything was answered in a reasonable time frame though.
Overall I was very impressed with WASD's pre-sales. I asked a number of questions, some that were even already answered on their website, and they answered everything.
Customisation
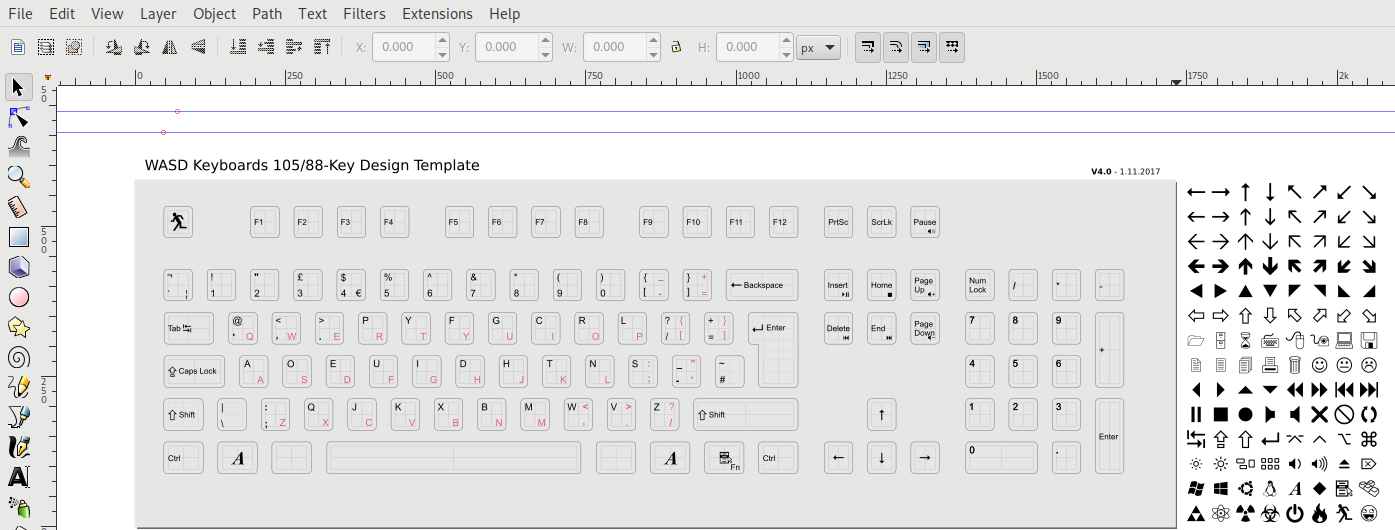
Given the need to have both layouts available to me I needed to be able to customise the key caps. WASD use UV colour printing to place your design on the keys and offer the keys themselves in a myriad of colours. The website has a very useful intro to custom layouts that provides some tips and, crucially, the layout file you'll need to edit.
Using SVG editing software such as Inkscape you make changes to WASD's provided SVG (a screenshot of mine is below). Helpfully, the SVG contains various layers corresponding to different keyboard layouts, media key symbols (or text) and a selection of artwork. I wanted the Amiga keys, LAmiga and RAmiga, on my board but the included graphics only showed LAmiga. A quick email to support and they advised they had the relevant artwork and I just needed to request it in the order comments box. Similarly I wanted Portal's "split man" logo spread across my ALT keys (as if the character was moving through the portal, from one key to the other) but I couldn't get a high enough resolution image to split in half and resize. Again a message to support solved the problem - they had the artwork already as they sell a single key with both halves on it. Note that WASD can only print the tops, not the sides of the keys.
As you'd expect from a custom keyboard, you're able to choose your preferred switch. I opted for Cherry MX Browns and had sound dampening O rings installed too. I could have installed the O rings myself, but by the time I'd purchased them, removed every key, added an O ring, and reassembled I'd have spent more time than the $8 difference it would have been to get WASD to do that for me. Eight dollars well spent to be honest.
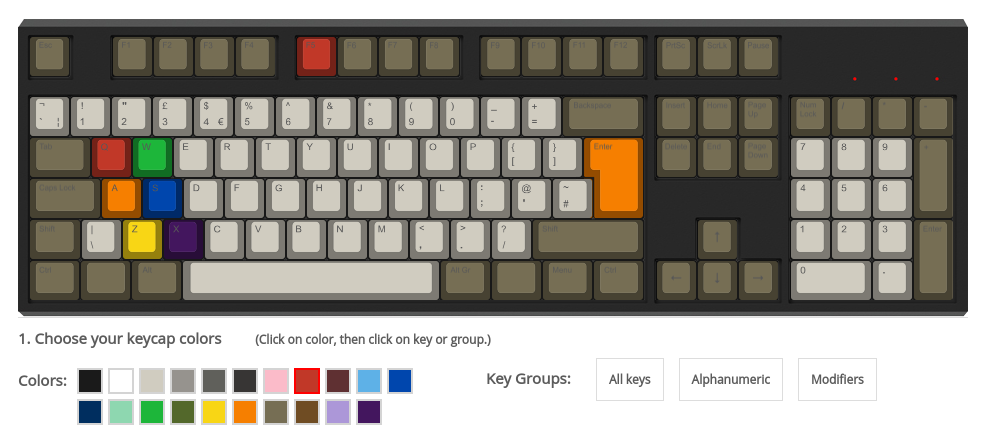
As I mentioned, the key caps come in a myriad of colours and you can select what you want for each key using the configuration tool on their website. The tool is quite easy to use (hastily mocked up example below) and you can colour each key individually if you want to. It's worth noting this colour is not printed onto the key cap but instead the plastic itself is that colour - this means the sides are the same colour as the top.
If colouring individual keys isn't your thing, WASD do offer the ability to print a custom image across all of the key caps. This was tempting, and looks really good, but I wanted to be able to quickly and easily see the legends on my keys.
Before the keyboard is sent for printing WASD send through a proof image for checking. Initially I'd incorrectly customised the QWERTY @ key (just to the left of return) and the media key symbols (volume down etc.) were touching the navigation cluster words (page down et al.). WASD kindly rectified these for me and sent though the second revision of my proof (full size here).

Delivery times
Having approved my proof image it was time for the keyboard to be sent for printing - an odd phrase. The design was sent to production within a day of my approval (given the different time zones it was probably sent off same day) and I was notified by email once the board was shipped to me.
Delivery was provided by UPS who also kept me up to date with progress. I was made aware of customs charges so I could pay these in advance - this meant there was no delay in the keyboard reaching me. I'm based in the UK, whereas WASD are in the USA.
After about 7 days the keyboard was in my hands, ready for use. You can read part two here, where I'll talk about the hardware itself.
Banner image is my keyboard proof.
Disclaimer: This keyboard was purchased by me, with my own funds. Beyond providing me with their service, WASD have not influenced this review in any way (they didn't know I'd be writing it).