
The Nanderson project
A project for a bit of fun.

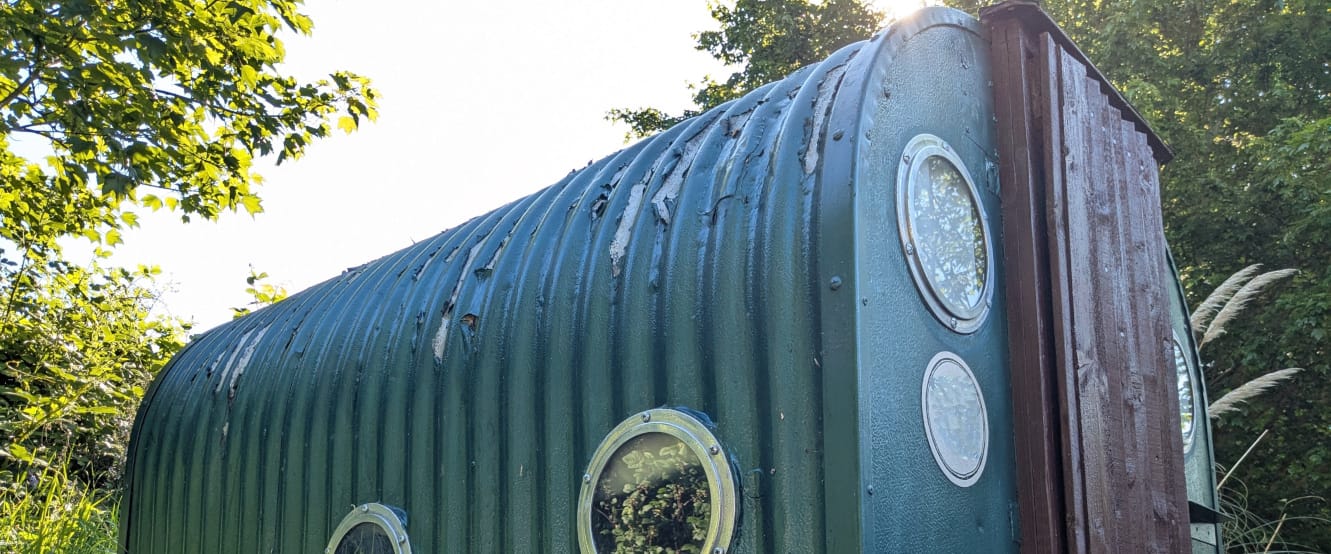
In 2022 I visited the Ramsgate Tunnels (certainly worth a visit if you're ever in Thanet) and there's a mock Anderson shelter in the entrance area. Afterwards, I suggested to my family over dinner that we put one in the garden, something I didn't expect to be approved! It was, and now we have a similar shelter in the garden - very much for fun, not defence. This blog post provides a tour of the shelter and a run through of the process. My wife takes the credit for organising the project, and most of the non-specialised work, with my brother and friends doing the concreting, brick laying, and electrics. My father-in-law built the door and bunks.
Given my house was built in the late sixties, there's no history of a World War Two era shelter in the garden, so there's no historical precedent.
Getting the metal part
Initial research showed that getting corrugated steel, that could be bent to make a traditional Anderson shelter, wasn't easy. There was a company that sold Anderson shelter kits, but they were out of stock, with no indication of a restock time. The size of the sheets seemed to be the problem, and true Anderson weighed potentially more than three quarters of a tonne.
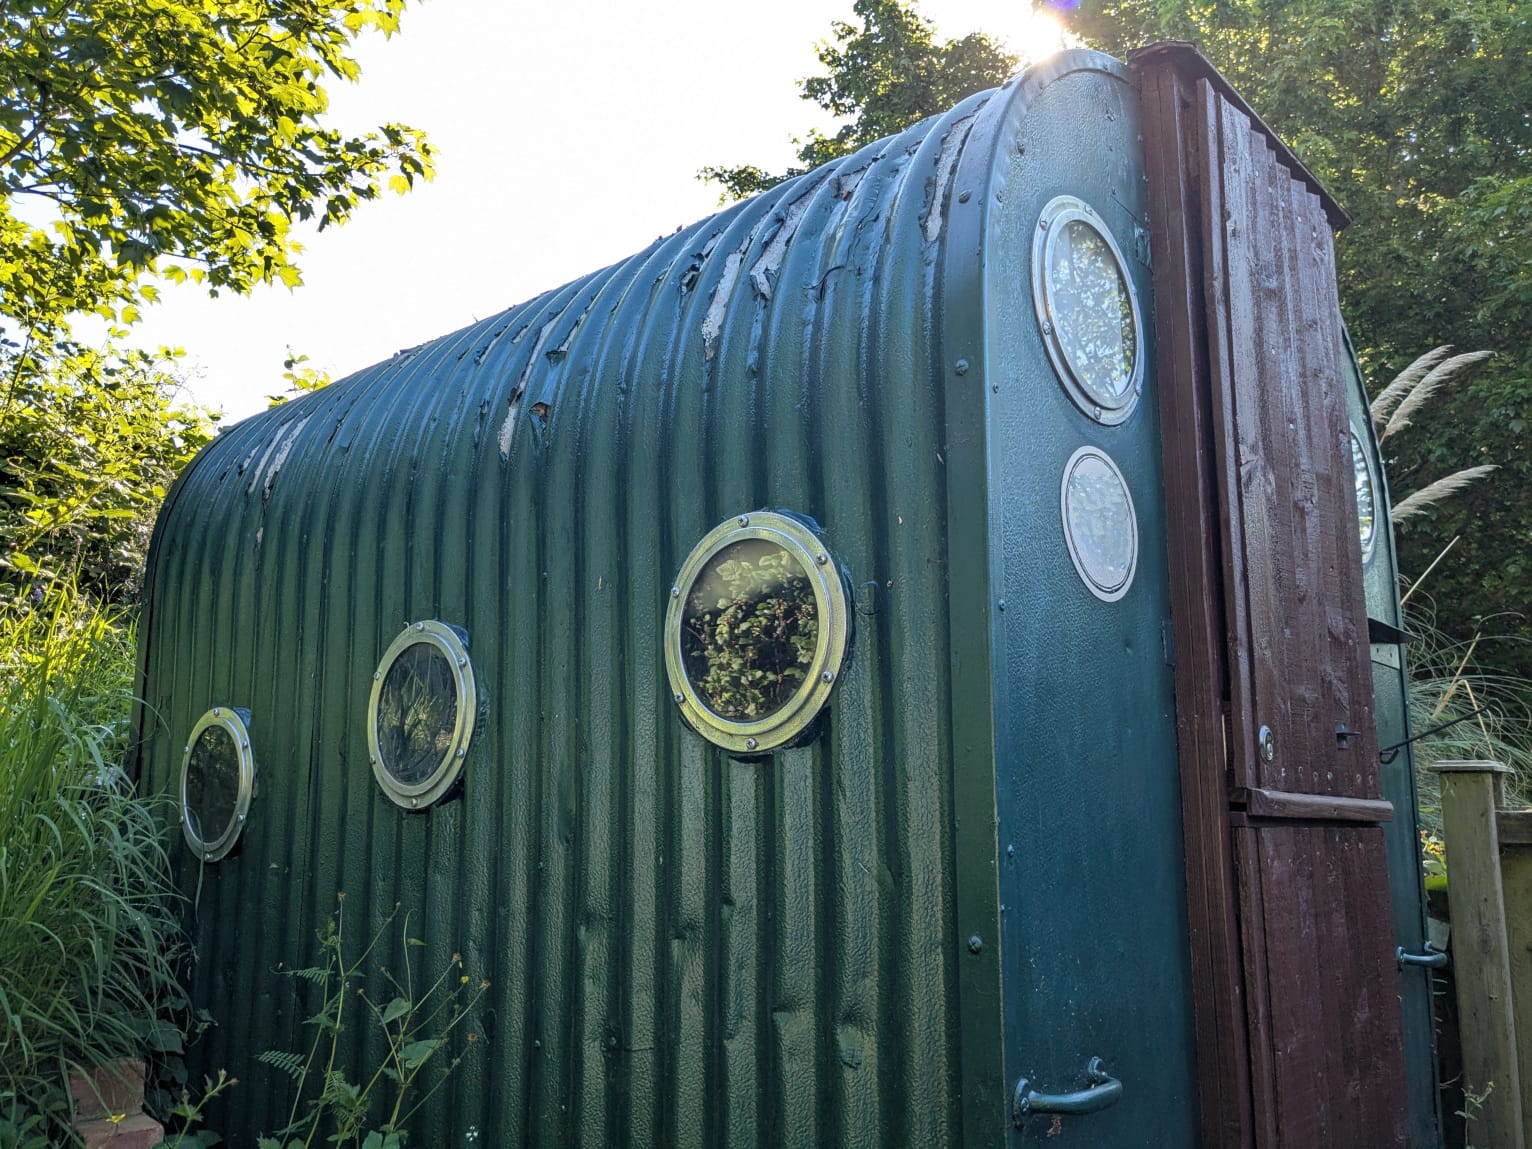
My wife proceeded to research (there's a whole community on Facebook apparently) and also kept an eye on eBay, whereupon an auction for an "Anderson like" shelter appeared. Apparently it had never been buried, was in someone's garden and was surplus to requirements. Three of us headed up there in a van and found an old workers' hut made from aluminium that became the basis for the Nanderson.
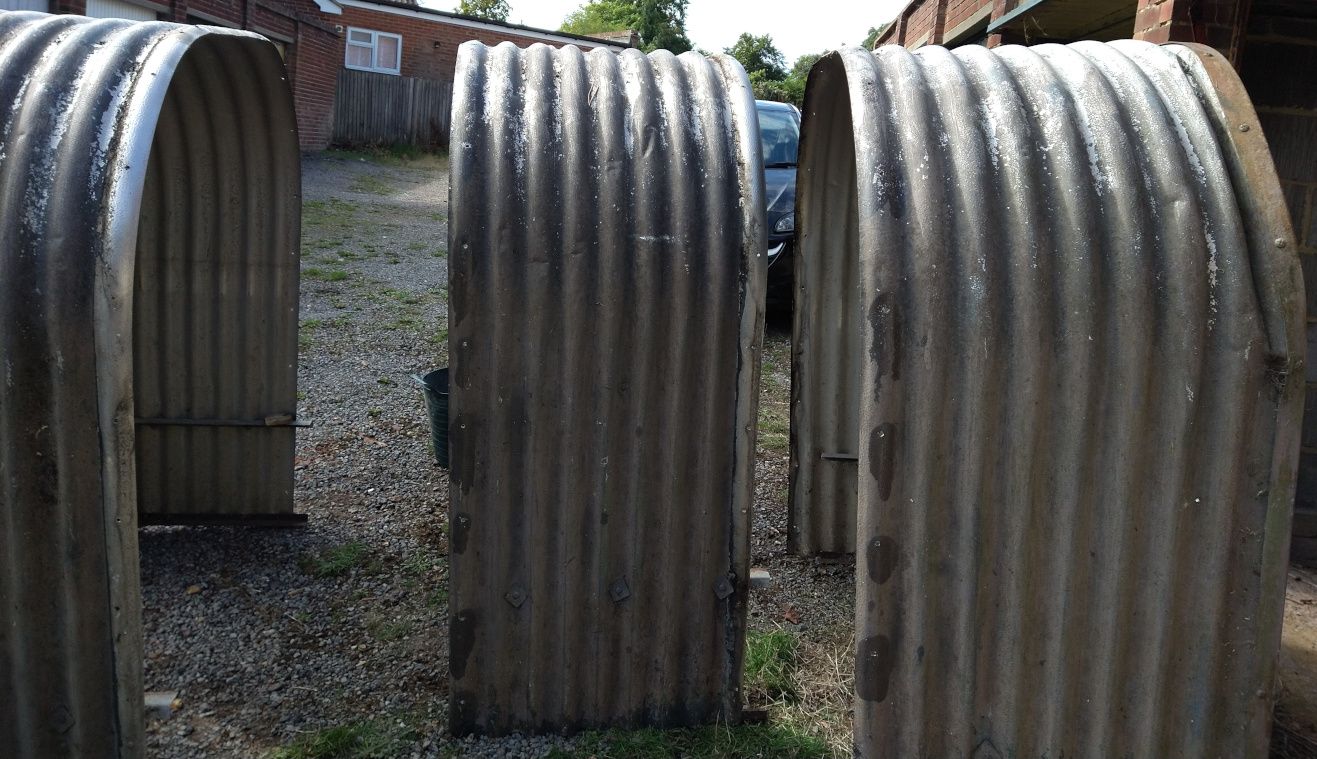
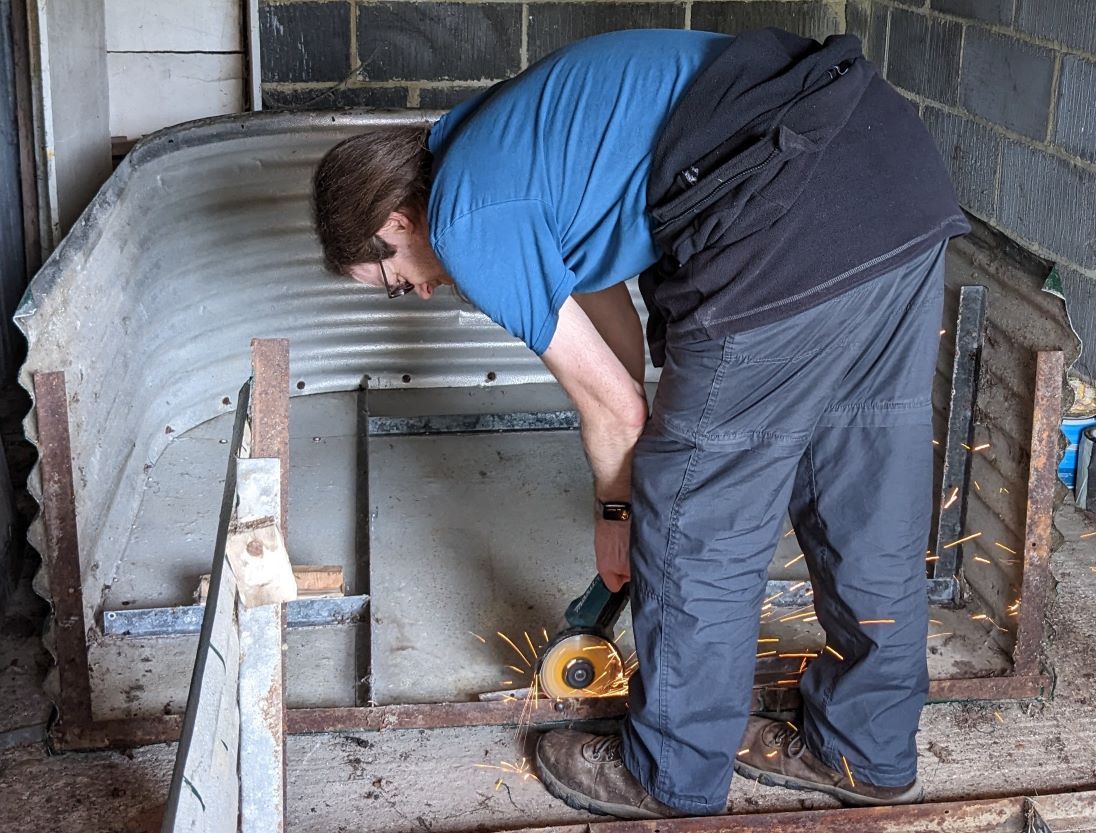
The hut wasn't in great condition, with some rusted components (bolts) and a rather failing wooden door. Separating the hut into three sections allowed for cleaning, repainting, and any repairs that were needed. I also got to play with a small angle grinder, which was terrifying but slightly cool - probably should have worn eye protection though (fortunately unharmed).
Why "Nanderson"?
It's Not an Anderson = Nanderson.
Anderson shelters (Wikipedia article) were made from corrugated steel panels, whereas our workers' hut is aluminium. They were a bit bigger than our workers' hut, at 1.8m high, 1.4m wide, and 2m long, and were also typically buried. You could stand on top of an Anderson shelter, which I wouldn't do with our Nanderson, and they could survive a lot of force from a blast - something our hobby project won't be able to do (we built it for fun, not defence)!
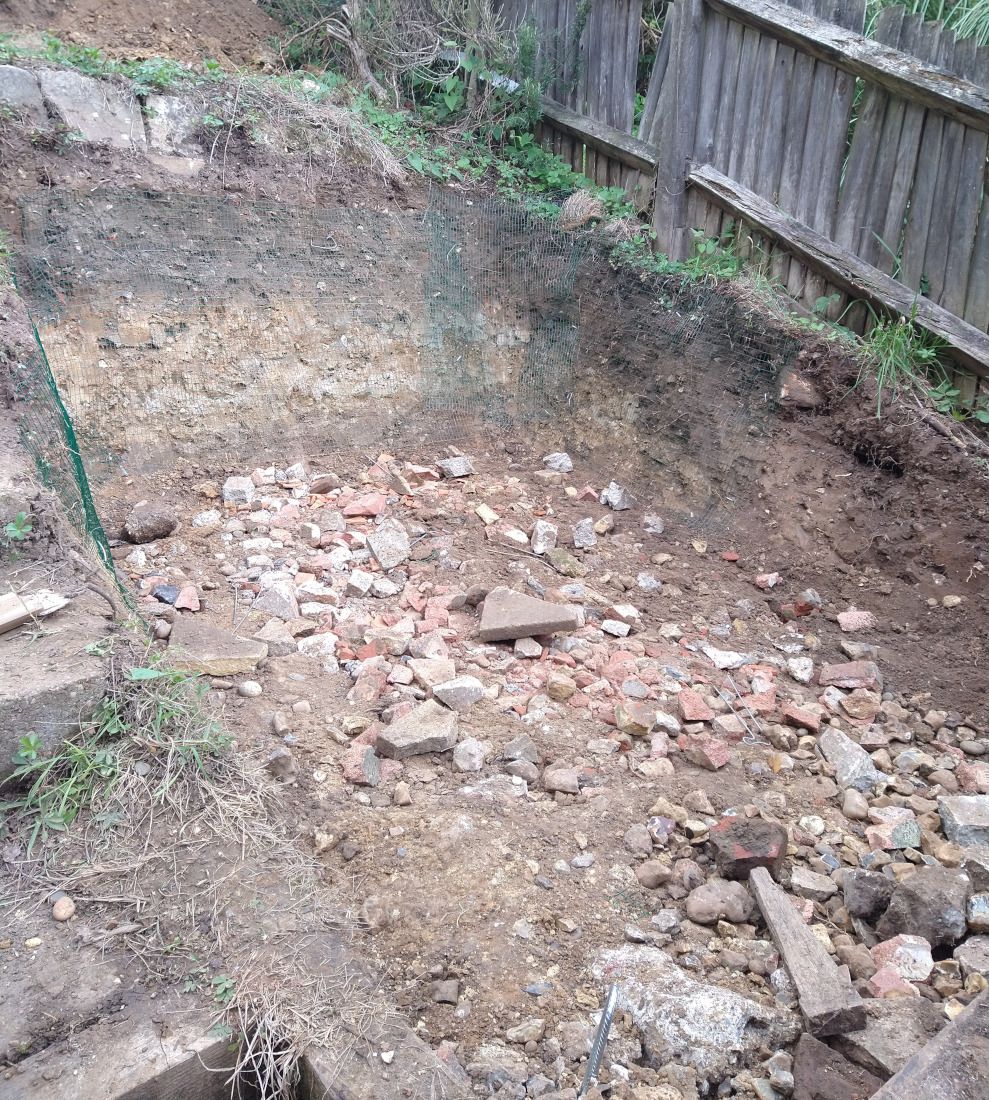
Digging a pit
I can take very little credit for the pit / excavation the shelter sits in - that was almost exclusively dug by my wife. At the time I proposed the idea we were losing my mother-in-law to cancer, and my wife pretty much "dug a rage pit" by hand.
As we were digging into the bank at the back of our garden, a lot of the soil went on to the other side, increasing its height and making it more level. Some soil also went to a neighbour as it was reasonable top soil. The rest went off in a skip.
It's not a great photo, but the back of the pit is around four feet high. This was part of an embankment at the bottom of our garden, so it was sloped, but that's still a lot of earth to move.
Floor and walls
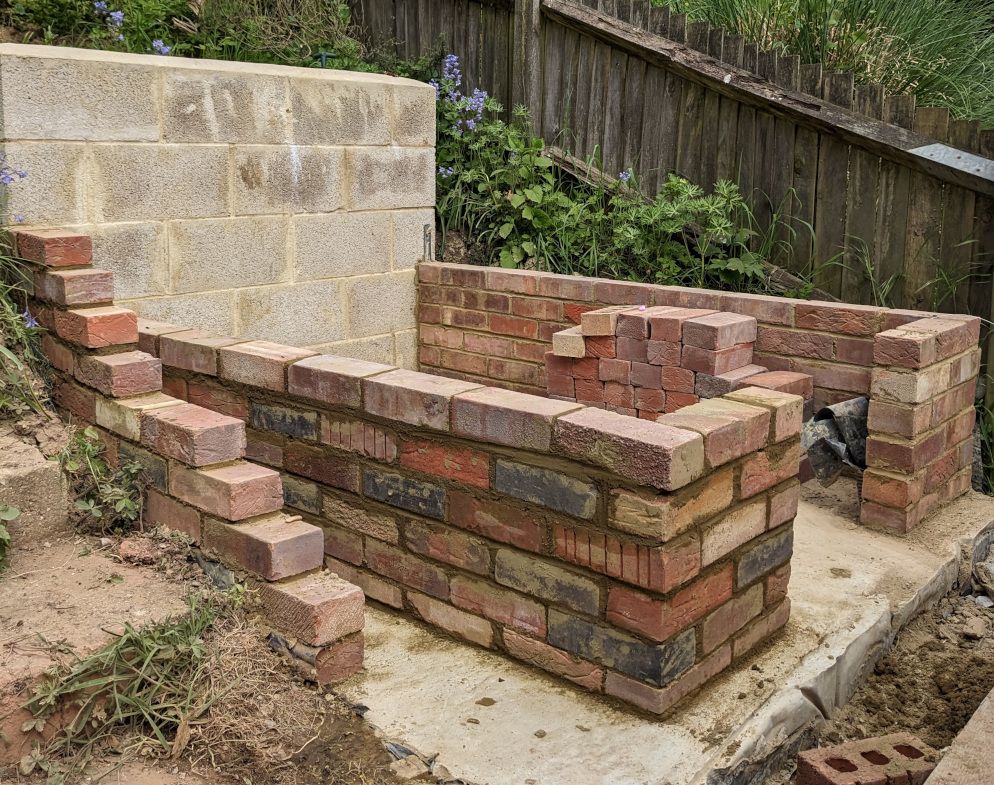
There's a concrete pad, using rubble as hardcore (bricks that didn't pass our quality checks), for the shelter to sit on. We then built walls onto the concrete to help provide structure.
Clearly we didn't want the bank to collapse into the shelter, particularly not if we were asleep inside at the time, so a retaining wall was built at the back. This is made from large concrete blocks, pinned in place, and then filled with concrete to make sure it cannot move. It's pretty sturdy. Once that had dried the outside of the wall was painted with bitumen paint to prevent leaks and soil was put back down behind it. We plan to have a number of plants growing in the top.
To give a bit more height (the itself hut is only 1.53m at its tallest) we built walls for the hut to sit on. These are made from red bricks, to which the shelter and door frame are bolted.
Portholes
There are non-opening windows in the shelter - specifically portholes. This was my wife's idea as, while not able to sleep one night, she suddenly thought "portholes" and messaged me so she didn't forget the next morning.
Our portholes are reclaimed from a boat (upcycling for the win) and made of glass with a metal frame. We placed three portholes in the side wall, at an angle (a more obvious diagonal would have been better), and one porthole either side of the door. There's blinds on the inside so if we're sleeping down there we don't get woken by early morning sunshine. Portholes added about £200 to the project.
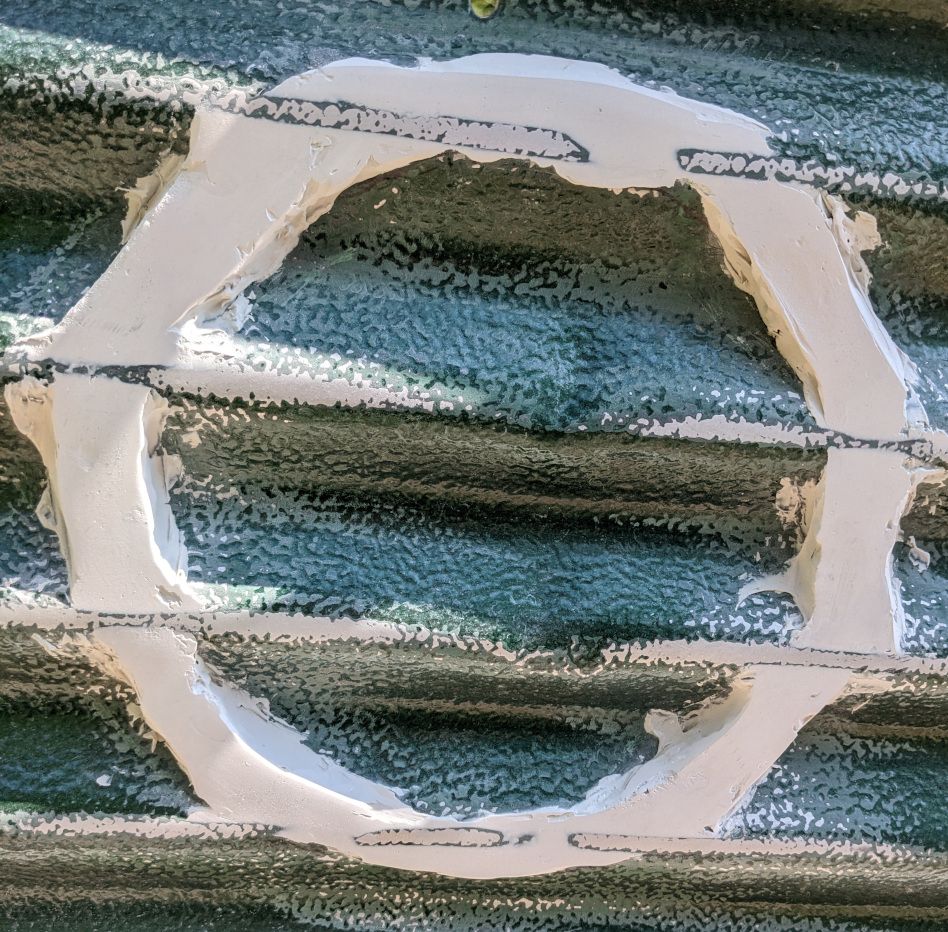
Given the shelter walls are is corrugated aluminium, attaching the portholes to the shelter was a challenge. Initially my wife tried a resin pour to create a level surface, but the resin took too long to harden. In the end she opted for car body filler, which set hard enough it could be drilled, with silicone sealant providing waterproof joins.
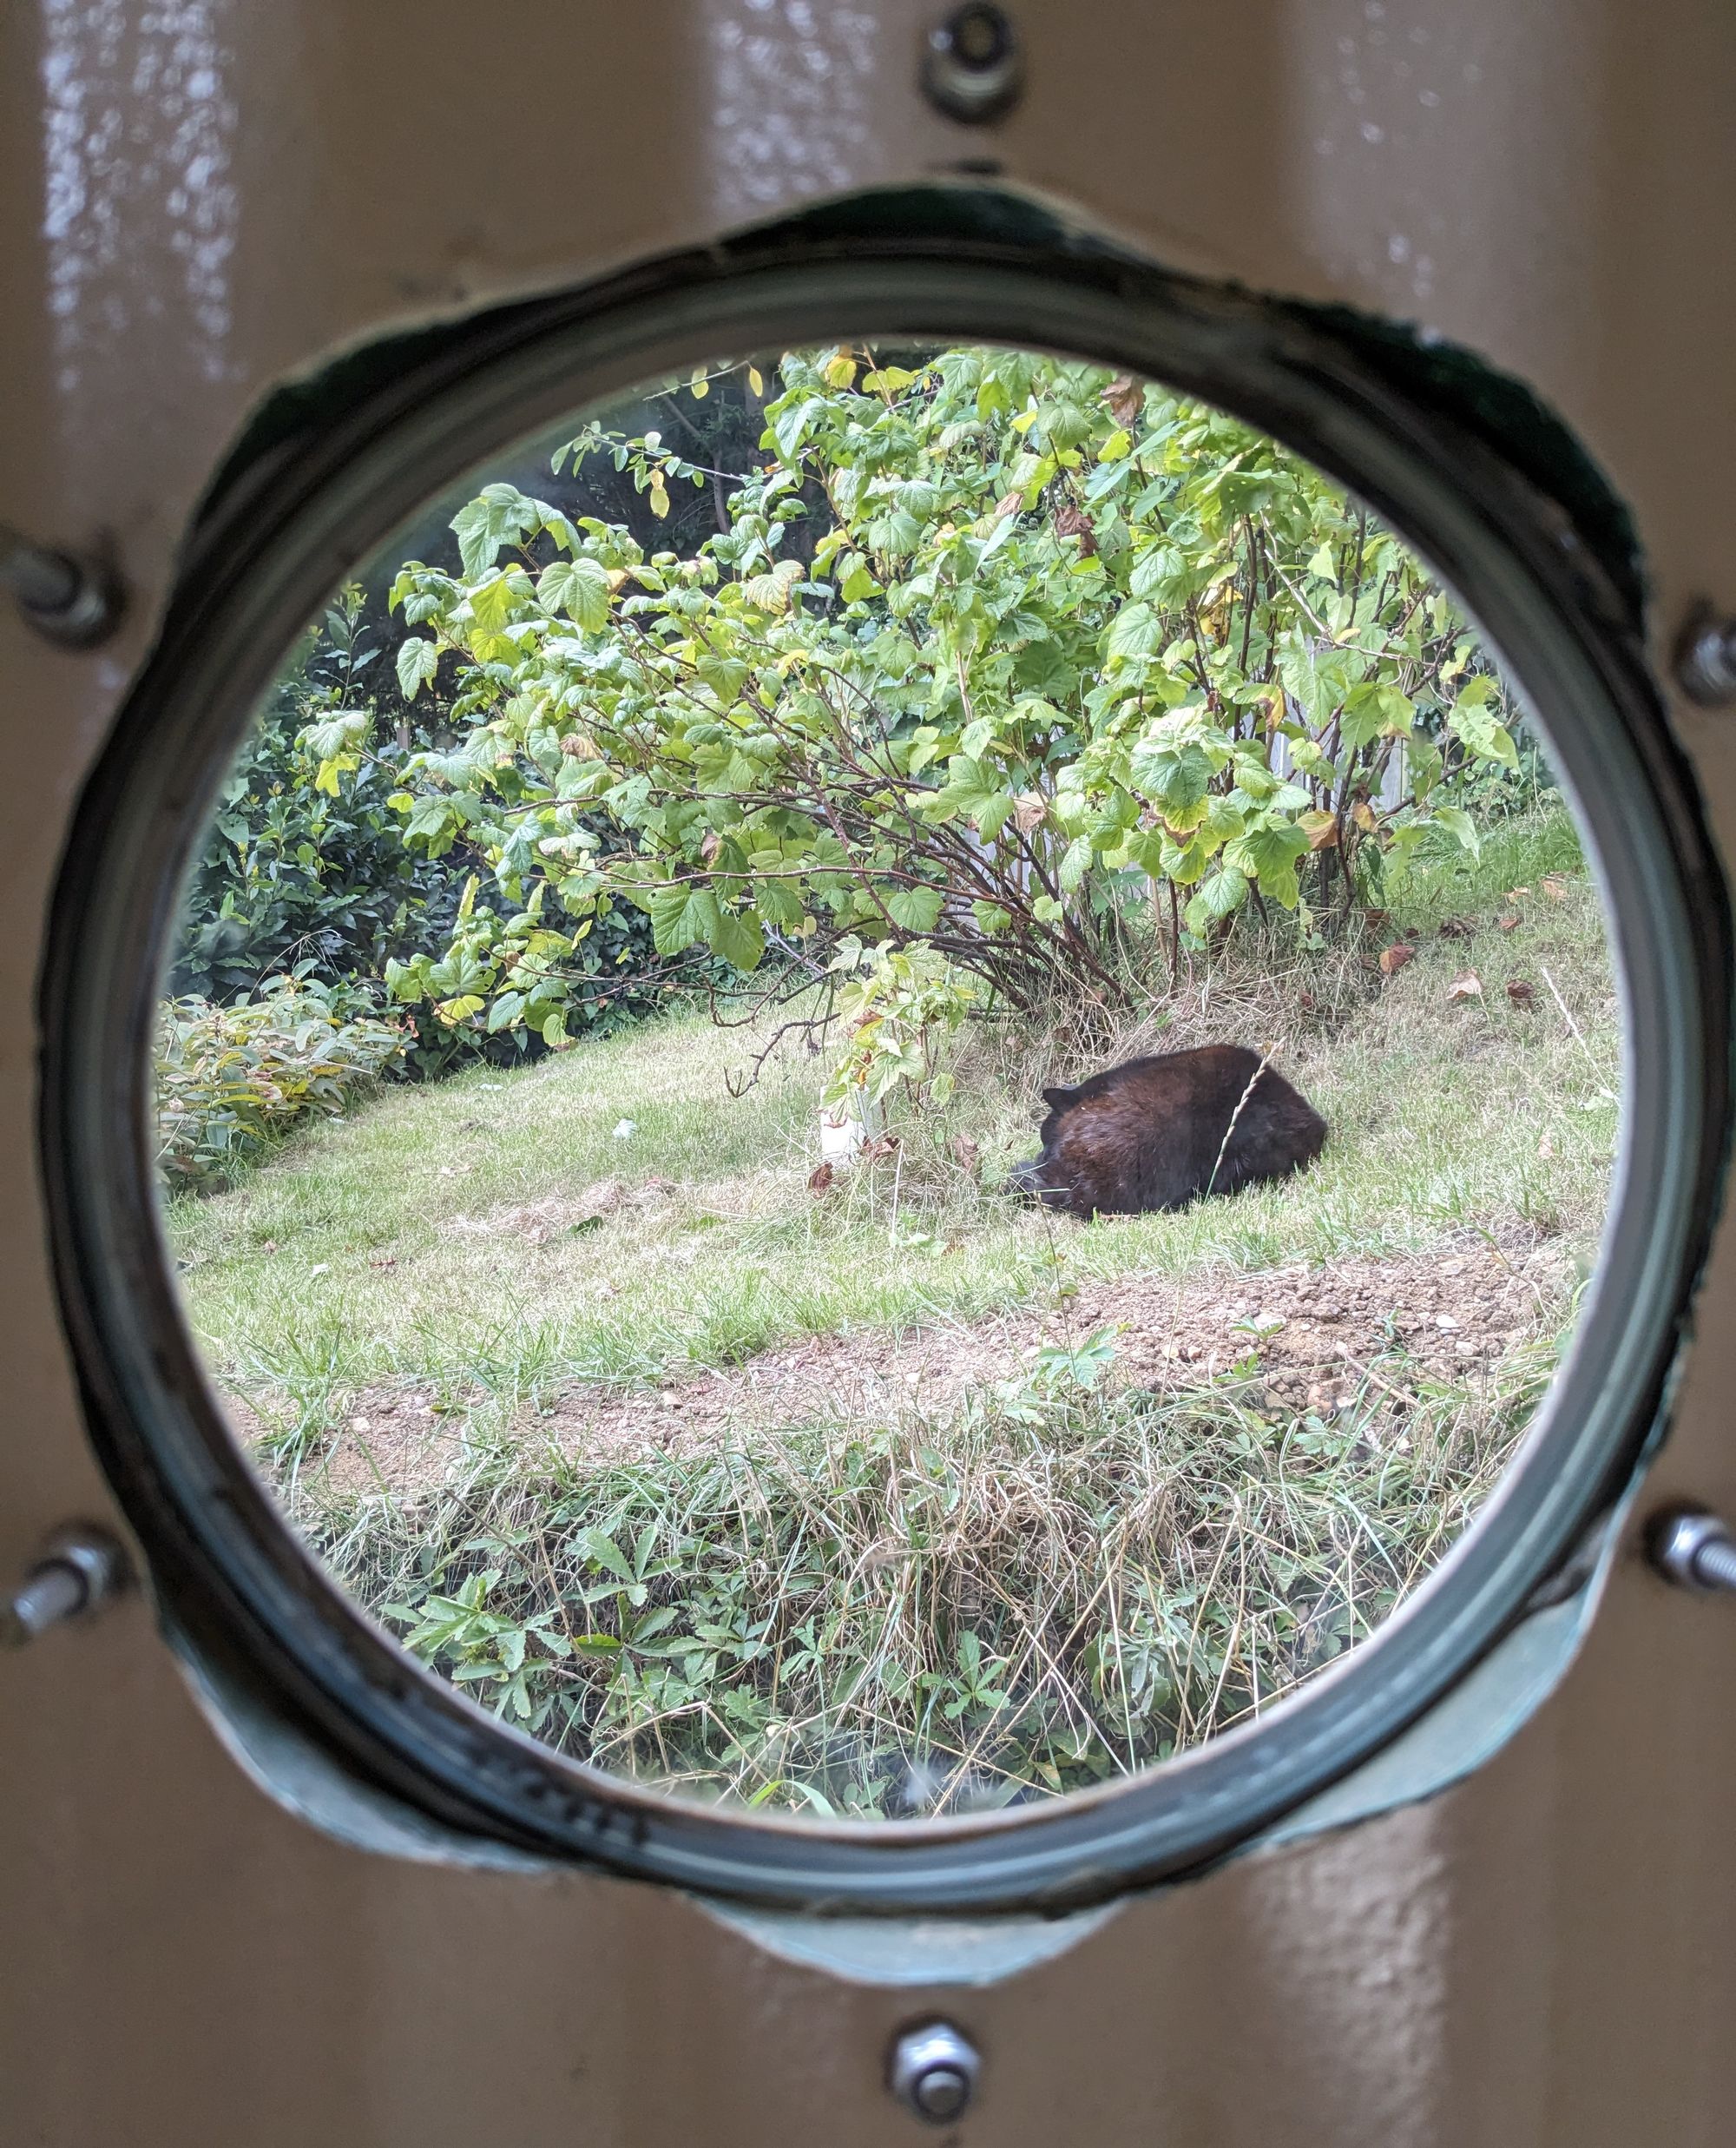
At the time of writing, there's no electrical light in the shelter, so these portholes provide some natural light. You also get a nice view of the garden, and my sleeping cat 🙂.
Dimensions
Inside the Nanderson is smaller than I'd originally envisaged, but is still a good size for a bit of fun. Pre-bunks we had four of us in there, one on a chair, with everyone around a small table. The floor size is about 1.35m wide by 1.8m wide. At its tallest the shelter is about 2m high.
Outside, the shelter sits on a concrete pad of 1.85m x 2.03m. There's space around three of the four sides, with the back of the shelter being the retaining wall.
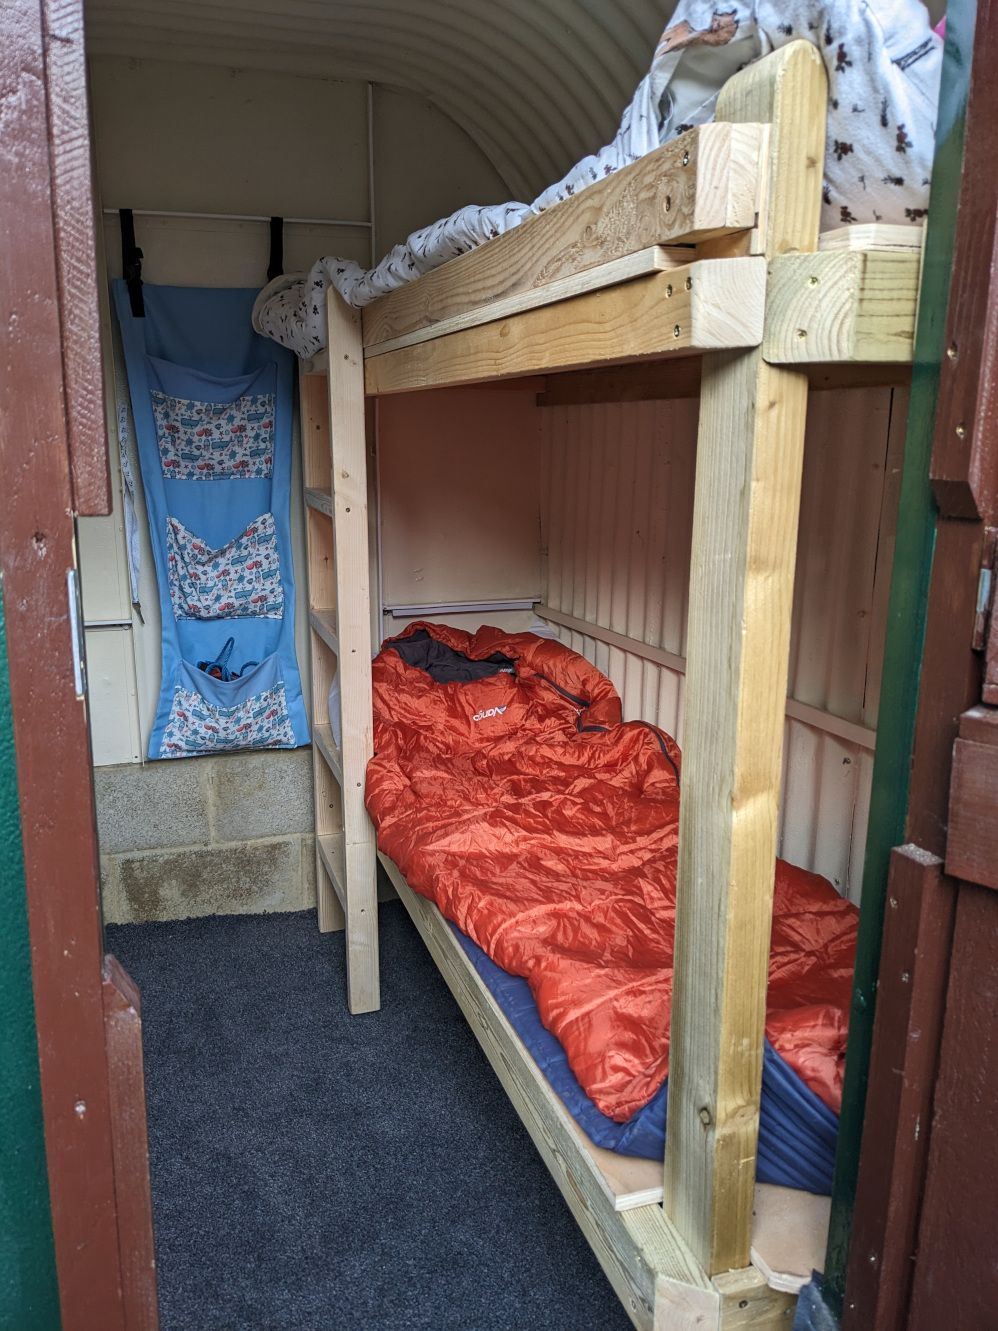
Bunks
What would be the point of having a shelter if we couldn't sleep in it?! It is possible to put a large mat on the floor and for all three of us to sleep side by side, but this really was a cramped arrangement. Instead we opted to build bunks on one side, leaving space for a chair. If a third person is sleeping in the shelter we put up a camp bed, which gives about 9cm between the two - if you want to get out in the night you have to side step!
My father-in-law and I spent two days building the bunks. When I say "we", I largely mean he built and I held, made tea, or fetched things - DIY is not my strong point. The bunks are made from 2cm thick plywood for the sleeping platforms with a frame built from pine. They're strong enough that two grown men can sit on the top bunk without issues.
For the modern age
One of our original plans had been that there'd be a hinged table so I could work from the shelter occasionally. To do that meant I needed power and an Internet connection, so we have three runs of Cat5e cable and a double electrical socket installed. These link back to the shed, which already has both services.
We haven't installed a permanent electrical light in the shelter, and we decided against a permanent table. If I want to work from the shelter I use a camping chair and table instead.
Temperature and weather
There is a temperature and humidity sensor in the shelter (at some point I need to add it to Home Assistant...), so we can track the temperature over time (I'm geeky like that).
In the Autumn / Winter, the shelter is roughly the same temperature as the outside, and in December I saw it regularly around 8° C in the day and as low as -2° C overnight. Given it's essentially a metal oven, in the Summer the shelter gets noticeably hotter than being stood just outside it - best to have the door open! Today at 10 o'clock the shelter is about 18° C, but in the hotter weather last week it was hitting 36° C regularly.
Apart from two leaks in the back corners, that we still can't find the cause of, the shelter is pretty watertight. Heavy rain doesn't cause water to be inside immediately (it follows later), and it's actually quite fun to be in with the rain hammering down outside - rather loud sometimes though!
Overall cost
In summary: not cheap! All in, the shelter cost around £2,000 - £3,000 of which one of the largest costs was the workman hut itself at £400 plus van hire and fuel to collect it. Potentially we could have got that cheaper, but it is what it is.
We attempted to save costs by getting pallets of slightly damaged bricks / bricks that didn't pass quality checks. Most of these bricks were usable, but they're bought as a job lot we had a lot more bricks than we needed. Some we gave away, others we managed to re-sell to recoup some of the cost. We have noticed that these bricks failed quality checks for a reason, hence some became hardcore for the concrete - you live and learn!
Now we just need to make sure we get some good use out of the shelter, to avoid it being an expensive, empty, shed 😊.
Conclusion
While it was a more expensive project than I'd first realised, or planned, the "shelter" is a bit of fun and we use it at varying points through the year. Certainly over summer I've been known to head down there and read a book over lunch. Over winter I've noticed it can get quite damp in there (no surprise, it's not sealed against the elements), and there's some mould forming on the roof and wood. A wipe down seems to resolve that though.
I'd have liked it to be a bit lower, and to not leak, but overall we're pleased with how it turned out. It's also quite a conversation starter, and something visiting children like to explore.
Banner image: Cropped photo showing the external view of the shelter, taken in May 2025.
Photos taken by me and my wife during and after the project.